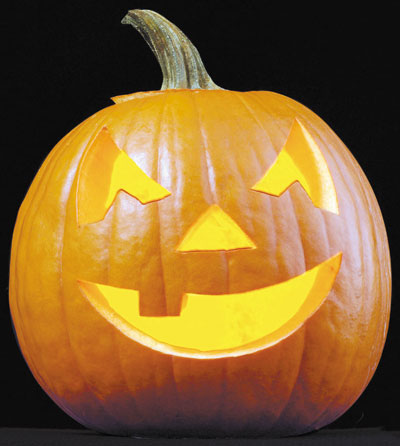
Whether you visit a pumpkin patch or the grocery store, look for
pumpkins that are large and ripe and have smooth surfaces and at
least a two-inch stem. If you plan to light your jack-o’-lantern
with a candle, the pumpkin should be at least 9 inches high.
PICK THE PERFECT ONE: Whether you visit a pumpkin patch or the grocery store, look for pumpkins that are large and ripe and have smooth surfaces and at least a two-inch stem. If you plan to light your jack-o’-lantern with a candle, the pumpkin should be at least 9 inches high.
Also, lighter-colored pumpkins are easier to carve because they’re softer.
CARVE IT WELL
Here’s a pumpkin-carving primer from FamilyFun magazine:
– Draw your design on the pumpkin with a water-based marker. Mistakes can be erased easily with a damp sponge.
– Cut the lid at an angle so the outside diameter is larger than the inside. This prevents the top from falling into the pumpkin when it shrinks.
– Serrated metal saws, now widely available in carving kits, are a safer alternative to knives and allow younger children to help. But remember, kids should carve only under adult supervision.
– Scoop out seeds and stringy flesh with a large spoon or ice cream scoop.
– Carve facial features closest to the center first and work outward. Use an X-Acto knife for details and the tip of a potato peeler to make small circles and curves.
– If you accidentally remove a section, use a toothpick to pin it back in place.
– Flatten a spot in the base of the pumpkin for the candle, but avoid digging too deep. If you do, the pumpkin is prone to rot.
Here are some tips if you’re using a stencil design:
– Attach the stencil to the face of the pumpkin with tape. You may have to make small slits in the pattern so it will wrap around the pumpkin.
– Use a poker tool to transfer the design onto the pumpkin. Follow the design’s lines, poking holes about one-eighth of an inch apart. Do not poke the holes all the way through the pumpkin, only through the outer skin. Be patient. Taking a little extra time now will save you headaches later on. Before you remove the stencil, check to make sure that you’ve made a complete dotted outline. After you remove it, save it for later reference. If the pattern is difficult to make out, rub flour over the holes.
– Use a carving saw to cut along the dotted lines. Remember, this is a saw, not a knife. Sew up and down in a steady motion, following your pattern carefully. Start at the center of the design and work to the outside.
– Always carve at a 90-degree angle, and keep your saw perpendicular to the pumpkin’s surface.
KEEP IT FRESH
Carved jack-o’-lanterns are short-lived, so it’s best to carve no earlier than a day or two before Halloween. (Or, carve early in the season for practice and then again later.) Seal in moisture by coating all cut surfaces with petroleum jelly or vegetable oil, or cover the pumpkin with a damp towel when not on display. Better yet, keep carved pumpkins in the fridge during the heat of the day. And bring them indoors on nights when the temperature may drop below freezing.
USE PAINT
Consider giving young children stickers, tempera paint or markers to decorate their pumpkins. It’s safer, and the pumpkins will last longer.
CONSIDER A FAKE
If you get sad watching your jack-o’-lantern morph into a hideous shrunken head, consider a synthetic pumpkin. Available at most craft stores, carvable polyurethane pumpkins look like the real thing (they even come in different shapes and sizes) but last for years. Candles are off-limits, though, so if you want it to glow, use electric lights.
TAKE A GREAT PHOTO
Tips from Chuck DeLaney, dean of the New York Institute of Photography:
– Fill the frame with your jack-o’-lantern and keep the background simple.
– To make the picture more meaningful, include the faces of family members. Get down low so you can see their faces over the top of the pumpkin.
– To capture an eerie glow, shoot at twilight and turn your flash off. Use high-speed film or a fast setting on your digital camera. If you can, put your camera on a tripod or other steady surface to eliminate blur.
– Don’t light just one candle in the pumpkin. Two or three will produce a far better picture.
– Want a really cool effect? Place the lighted jack-o’-lantern in a fireplace and make a small fire from a few sheets of newspaper behind it.
ROAST THE SEEDS
Wash pumpkin seeds and pat them dry. Combine with 1-1/2 tablespoons melted margarine, 1/2 teaspoon salt, 1 teaspoon garlic salt and 2 teaspoons Worcestershire sauce. Place in a shallow baking dish and bake at 275 degrees for one hour, stirring occasionally.
PLAY PUMPKIN GOLF
Carve a pumpkin, making the mouth extra large. Build a cardboard ramp from the ground to the bottom of the pumpkin’s mouth. (Provide some support under the cardboard, such as books, and tape the ramp to the floor for stability.) Designate a starting point a few feet from the ramp and have players try to hit a golf ball into the pumpkin. Winner gets a piece of candy or some roasted pumpkin seeds.


